
When you are in the wild and have limited resources, it is essential to know how to make a campfire for cooking. The first time I had to build one was when I ran out of propane in my camping stove and had to improvise some heat to get my water boiling. Frankly, the process is quite simple, and you should keep on reading even if you are used to more conventional methods.

To make a campfire for cooking, you should merely follow the next six steps:
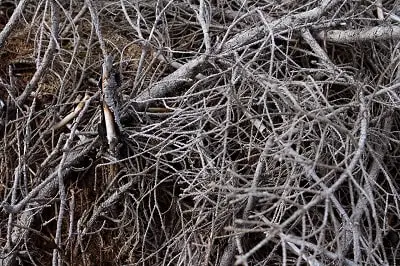
- Gather the right firewood – make sure that it is dry and on the appropriate size.
- Find the right site for cooking by sticking to flat locations.
- Arrange a few large stones in a U-shape and place your firewood in the correct position.
- Place some kindling and tinder in between to haste the ignition.
- Light up the core.
- Start cooking over the burning coals.
Short Burning Campfires (A Snack Fire)
When it comes to preparing meals using a campfire, you can either make a ‘Snack Fire’ or a ‘Cooking Fire’. Snack fires are the simpler version, and you can make one if all you care about is preparing a simple meal or using a camping coffee pot.
The process is quite simple – all you have is to make a small teepee by leaning a few twigs against one another. Be sure to leave enough open space in the middle for the tinder.
In this case, tinder can take the shape of paper, leaves, or anything else that catches fire with ease. Snack fires are prevalent because you can start one in mere seconds.
Long-Standing Bonfires (For Burgers, Kebabs & More)
‘Cooking Fires’ are somewhat different and relevant when you wish to avoid using a camping stove. The requirements for such a campfire include:
- Firewood which can vary in size depending on the need.
- Kindling which is what will keep the fire going after you start it. Twigs will do.
- Tinder which includes grass, leaves, newspapers and the like.
The actual process of starting a campfire for cooking typically involves the following:
1. Find The Wood
Select the perfect wood. Proper campfire wood must be dry (although it is also possible to light wet firewood). Fight the urge to cut the branches off the first healthy tree you see.
Green branches from live trees will burn just fine, although they will also produce the sort of smoky fire that will send you fleeing from your campsite. Dry hardwood isn’t hard to find.
2. Sick For The Right Location
Once you have the wood, you need to locate an appropriate site for your campfire. The location should be flat, rocky and several feet away from the nearest bush. Watch out for any overhanging tree branches.
Basically, don’t start your cooking campfire near any combustible material. You should also keep the wind in mind – you could find shelter behind a hill or a tree.
3. Prepare The Site
Find some rocks and arrange them in a U-shape. Most camping professionals would encourage you to place a large stone at the rear of this arrangement. It will act as a chimney that draws the smoke away. As has been mentioned above, consider the wind. Keep it to the back of your new fire pit.
Regarding the rocks, make sure that you pick those that are high and feature equal height. This way you will be able to place a pan or a pot on top of them without suffocation the fire. Also, make sure they are not smooth so that you avoid exploding campfire rocks.
Arrange the firewood in neither flat, piled-up shape or in the form of a tent. The first wouldn’t require any effort and would allow the flame to run longer. A tepee form, on the other hand, is associated with some preparations, although it would haste the ignition process due to proper airflow.
4. Use the Kindling/Tinder
If you chose paper as your tinder, place it in the space between the logs and add the kindling (small twigs) on top. The key is to stack the twigs in an alternating direction until the paper is fully covered.
Make sure not to stuff the interior volume too much – you must have a proper airflow to catch fire. As with firewood, make sure the twigs are dry and combustible.
5. Light the Fire & Arrange The Coals
Introduce fire to the tinder (the paper) underneath the kindling. If you succeed, that fire will eventually set the kindling ablaze.
Once that happens, you can add firewood on top of this arrangement. Try to use evenly-sized logs and allow the fire to burn long enough to create hot coals.
Find a stick that you can use to redistribute these hot coals towards one section, making that end much warmer. This will allow you to create varying cooking temperatures and settings.
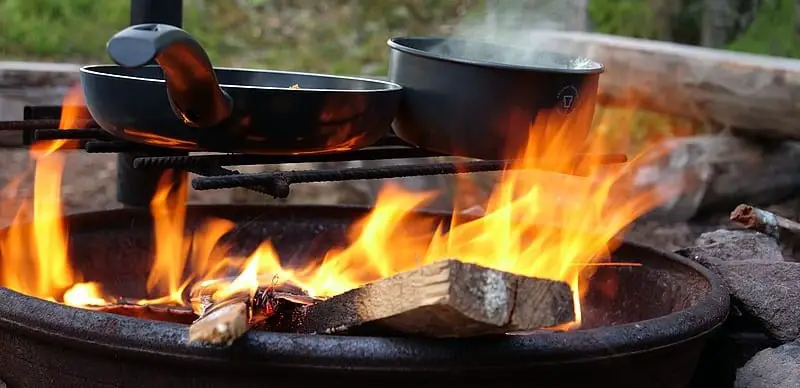
6. Carefully Start Cooking
After this, all that is left is to place a grill on top of your campfire to cover the burning coals. Make sure that the mesh is broad enough so it won’t slide once you cook.
Get your pans and tongs out, and start cooking. Make sure that you are prepared for dangerous scenarios by keeping a bucket of water nearby throughout this whole process.
You must act immediately if your fire starts to show signs of running out of control. Also, make sure that your campsite allows fires. Some National Parks are prone to wildfires during certain seasons, so they restrict the set of cooking fires.
Extremely Prolonged Campfires (For Soups, Potatoes)
The techniques mentioned above gave you a general idea on how to make a campfire for cooking. Still, there is a chance you would like to prepare a meal which requires a long-standing heat.
It is possible the conventional methods would work for you, although it is better to know your options. My favorite approach is building a self-feeding flame. The principle here is that you take advantage of gravity and natural consumption. To do so, consider the following steps.
1. Make a Ramp
Build yourself a ramp that features approximately 30 degrees from the ground, using a few long sticks (you can quickly find these outdoors). You would probably need a proper rope for that matter. Also, it is essential that you know some basic knots before you start.
2. Put a Few Bulky Logs
Place four to five large logs in a cylinder shape and place them on the ramp you’ve built. The first wood in line is the one which touches the ground and would be the first one to lit and burn.
3. Start The Fire Going
Implement the steps from above to light up the campfire and get the process starting. Once the log at the bottom gets consumed, the next one in line would take its place and keep your fire going.
You may find more in-depth examples in an article I’ve written on how to make a campfire burn all night. The self-feeding fire is merely one of many. Also, I suggest that you take a glance at the following video to get a better visual perspective.
How to Avoid a Smoky Taste?
When you are using a campfire for cooking, it is prevalent that your food gets a smoky taste. This one is a natural phenomenon since you are no longer using gas for cooking. Instead, you are using combustible, solid materials.
If you are using skewers – there is no way around it since your food is directly above the flame. If you are using a grill – you might prefer switching to a pan or a pot which aren’t perforated.
Besides choosing the right tools, you should also minimize the smoke by using the proper materials. Do not add too much paper to act as your fuel – it releases a lot of smoke during its burning process.
Instead, you might find it useful to use gasoline. You should always make sure that the fire is exposed to a sufficient airflow to burn. Still, consider that too much air would release more smoke. When it is limited you fire would both go on longer, and the smoke will be less exaggerated.
What Can You Cook on a Campfire?
There are quite a few ways to approach campfire meals. As far as the tools you should take advantage of, you need to keep the following in mind:
- Avoid Plastic utensils. They are going to melt. Find metallic tools; otherwise, things will go very wrong very quickly.
- Metallic utensils also present a risk. If you introduce them to your campfire, they will grow hot enough to cause harm. It is for this reason that many campers invest in traditional metallic pots and pans with rubber handles. This approach makes sense, but you are better off spending your money on utensils that have been specially crafted to work outdoors.
Regarding the methods you should use, there are quite a few conventional approaches, including the following:
- Skewer cooking is simple enough because it allows you to experiment with hotdogs, marshmallows and the like.
- Barbeques are a little more complicated because they require the use of a grill. But barbeques are definitely an exciting option for the great outdoors.
- Some people have gone so far as to go camping with Dutch Ovens because they avail greater flexibility when it comes to cooking.
As far as the foods that can be cooked on a campfire are concerned, you have several options:
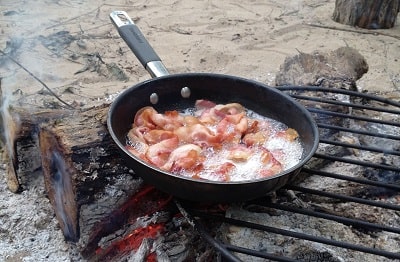
- Hot dogs and marshmallows are widespread. And then there’s bacon which anyone can make so long as they have a roasting stick.
- Fire-roasted fruits might also intrigue you. Get yourself some bananas, peaches, and apples and have a bit of fun experimenting.
- Kebabs can make for a delicious meal if you have the right vegetables on hand. You can also try grilled cheese, potatoes, Bannock and Corn Fritters to mention but a few.
How Do You Cook Burgers on a Campfire?
Cooking burgers on a campfire is a simple matter of executing the following steps:
- Get your campfire started by taking the steps described above. Position a grill over the fire pit and place the patties on the grate.
- Do not actually set the grill on top of the fire. The patties will burn. Instead, use the handle to hold the grill a few inches above the flame. If you feel tired – it is okay to lay it on the rocks themselves for a short period. You may even place the grill upon the consistently if you’ve picked stones which are high enough (at least 5-6 inches).
- Give it seven or so minutes. You will hear the patties start to sizzle. Turn the patties over and then put the grill back into position. Wait for the other side of the patties to cook.
- Keep checking on them. Once they achieve your desired state, take the patties out, place them on a plate and then retrieve your hamburger buns. The rest should be obvious.
You can also cook frozen burgers. But it will take a little longer. You have to flip the patties more frequently. Of course, you must first give them a few minutes to thaw. It is also in your best interest to season the patties with salt and pepper beforehand. Enjoy!
Should I Bring a Camping Stove Instead?
Creating a campfire for cooking is a pleasant way to experience nature and neglect the old habits from home. Nevertheless, doing so does feature its downsides.
Besides the smoky taste your meal might be getting, cooking with a campfire requires a lot of preparations. Instead, you could merely switch your camping stove on and get your cookings done in minutes.
If you have enough room in your backpack – sure, you should get yourself a camping stove and bring it along. When you feel tired and have a limited amount of time – turn it on and make yourself a warm meal.
Knowing that using a campfire for cooking is a valid option is still essential since you can implement it when you run out of gas or when your camping stove had stopped working, for instance.
Conclusions
Building your own campfire to prepare meals could sound intimidating at first, especially when you are not familiar with the process.
Nevertheless, when you organize your thoughts and follow the right principles, as described in this article, things should be okay. Obviously, there is room for personal improvisations and approaches. Still, make sure that you take the right precautions to avoid any mistakes.
I hope my article had shed some light on how to make a campfire for cooking. If you have any ideas and new insights – let me know all about them by leaving a comment below!