

Bouldering crash pads are not cheap. Most bouldering crash pads are over $200, so many people want to make their own bouldering crash pads. I have found a very cheap way to make bouldering crash pads.
A cheap way to make a bouldering crash pad is to gather together some foam and then create a cover for the foam. This will make a very nice bouldering crash pad that will keep its owner safe. This bouldering crash pad can be reused for any dangerous sport, such as aerial work or gymnastics.
I have created detailed instructions on how to create this bouldering crash pad. This should make the creation process easier for you, so read on to learn more about how to create your own bouldering crash pad.
Step 1: Supplies
You will use foam that is 3 inches tall 8x2x4. Some people have foam in their basement from past furniture, or you might find foam cheaper at a second-hand store. It might not fit the dimensions mentioned above. Feel free to layer your foam. I am going to explain how to alter your foam.
You will then need 7 yards of plastic leather of any color you want. You will also need 1 yard of open-weave fabric.
A sleeping bag zipper will work the best for you. I used a 100″ long one. You will also need very thick thread. To sew plastic leather, you need a heavy, thick thread to sew without breaking. Jean thread would be a good option for this project. Jean thread is very thick so it should be able to withstand going through plastic leather.
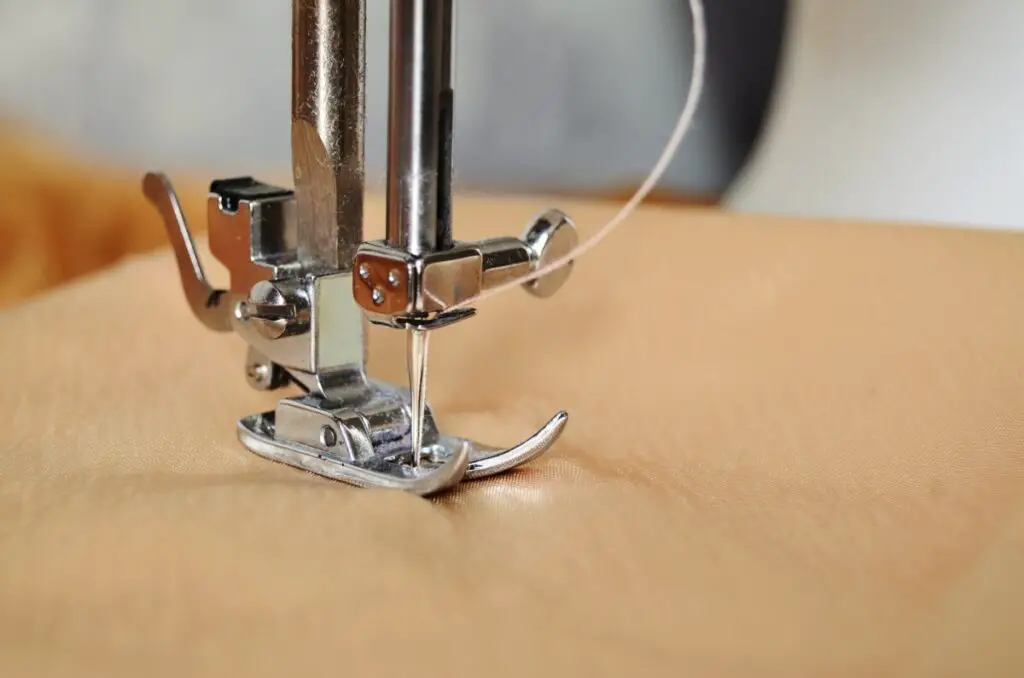
You cannot make this unless you have access to a sewing machine. You can check with your friends and see if they have one they will let you borrow. If they do not then you can rent sewing machines from places like Joanne fabrics.
You will also need Dan Tack Foam and Fabric Adhesive if you need to alter your foam. If you do not need to alter your foam then you will not need this. Still, though, just find the cheapest version of this and it will work for your needs.
Dan Tack Foam Silicone Spray will also be very useful, but it is not necessary. It is hard at the end to get your foam in the fabric and this spray will help act as a lubricant that will help get your foam inside of your sewing piece.
Step 2: Glueing Foam
If you were not able to find a piece of foam that fits the size of the project, that is fine. This step is for you. If you found foam that is the correct size, you can skip this step.
You need to take your foam and cut it to be the right size. If you have multiple pieces of foam that are smaller than each other and you want to put them together then you need to glue them together. You can glue your foam with the Dan Tack Foam and Fabric Adhesive.
You are going to spray your Dan Track Foam and Fabric Adhesive onto your foam and then place your foam pieces together. You then wait 30 minutes. Make sure that your foam is on a solid surface. Any slipping during the drying process will cause issues with your foam.
Once you have waited 30 minutes check and see how well the glue has stuck. If it didn’t stick well, apply more or wait longer for it to finish drying. The glue needs to be strong because the foam is going to have to squeeze within the cover you are making for it and the cover is supposed to be tight on the foam. Therefore, make sure that your foam is able to withstand being manhandled.
Step 3: Your Pattern
Now it is time to create the actual pad. The easy part of this pattern is that all of the pieces are rectangular. This means you do not need to print any pattern. You can just copy the dimensions I am going to mention below. This should help you cut down on time and expense.
To start you are going with two pieces that are 73”x49”. This is going to be the top and the bottom of your crash pad. You will use the plastic leather for this.
You will then cut out two pieces that are 100” long and 4.5” wide. This will give you a place where you will end up sewing your zippers.
You will need another cut of plastic leather that is 9″ wide and 21″ long.
The last cut you will make from the plastic leather is two pieces that are 11”x 5.5”. This is going to become your handle and it will be the first thing we sew so keep that on hand.
Now for your open weave, you are going to cut two 9″ wide and 21″ long strips of the open weave. This is going to work as the mesh for your crash pad. This will give the crash pad some air to be able to compact when it feels your weight land on it.
Make sure you mark the sizes of your pieces once you have cut them so you do not mix them up. This will help you later when you are in the sewing process.
Step 4: Making Straps
Now it is time to make your handles. You are going to make two of these. This is a good time to learn how to sew on plastic leather. You are going to make sure your needle is very sturdy in your machine and we already talked about how you will need very thick thread.
Once you have your sewing machine set up you are going to take your two 11”x 5.5″ pieces. Once you have those pieces, fold them in half with the wrong side facing outward.
You will pin the two ends together and start sewing with a regulation stitch on the 5/8 line. Make sure you backstitch your work. Once you have done that you can finish your ends however you like to finish your ends.
Flip your piece right way out and you have a handle repeat this with your other 11″x5.5″ piece.
Step 5: Sewing on the Zipper
Let’s zipper up. Grab your pieces that are 100″ long and 4.5″ wide. You are going to start by pinning your zipper in between the two pieces of fabric. This is how it is going to end up when you are done sewing.
You then are going to sew across the width end of the material. You will do this on both ends of the fabric and this is going to secure the zipper and the pieces of fabric together. You will use a basic regulation stitch for this process.
Once your ends are sewed together, you will move onto the length-wise grain. You are going to sew this at a .25 seam allowance. Are going to start at the end of the zipper sew out a little and then pivot and sew the rest of the zipper length-wise until you reach the end where you will pivot back towards your zipper and finish it off that way. You will repeat this process on the other side. This will secure your zipper.
Now you have your zipper and it is ready for your next step.
Step 6: Sewing Sides Together
Now you are going to add on your weave fabric. Start by finishing your weave fabric. Run it through a serger or use a serpentine stitch on the edges of your fabric to make it ready for usage.
Once you have finished your fabric you are going to pin it on top of the plastic leather that your zipper has been sewn onto.
You will pin it so it fits to shape. You will then sew all four edges of the woven fabric onto the plastic leather using a regulation stitch. At the corners, use reinforcement stitch to make sure that your fabric is very secure. Once you have done this, cut where the zipper is at and sew that to the plastic fabric.
You will do the same process to the 9”x21” plastic fabric piece you should have, except there will be no need to cut a zipper hole for this piece of fabric.
Once you have gone through and sewn on the interfacing fabric, you are going to sew the other long pieces of leather plastic that are 9″ wide and 21″ long to the zipper fabric. You will need to pin one edge to one end of the zipper fabric and the other edge to the other end of the zipper fabric.
This lengthens the edge of the fabric to be large enough for your foam. Sew the pieces together with a 5/8 seam allowance and a regulation stitch. Make sure you backstitch to secure the fabric together. Complete this on both ends of your zipper fabric.
You should have a rectangular fabric that will be the side of your crash pad.
Step 7: Sewing the Top to the Sides

It is now time to sew your side pieces onto the top of your crash pad. This is a bit more challenging since you are starting to make it 3D.
You will need to grab one of the large pieces you cut and pin one of the ends of your zipper fabric around the edges of your top piece. Once you have done this, start on the corners with a reinforcement stitch. You will backstitch the first five stitches and stay on the reinforcement stitch until you are an inch away from the corner. You can then switch to a regulation stitch.
You will stay on the regulation stitch until you get an inch away from your next corner where you will switch back to the reinforcement stitch. Once you get to the end of the corner leave your needle in the fabric and pivot your machine to sew the next side. The goal is to make this edge stitching all one stitch.
Before you finally go through and sew the bottom of your crash pad on, you are going to pin the handles onto your crash pad. You will pin them onto the smaller ends of the mattress and sew them into the mattress with a regulation stitch. I would then go and backstitch the entire handle. This will secure it more and make it less likely to break when carrying it around to different locations.
Step 8: Sewing the Bottom to the Sides
Now it is time to work on the final part of the cover. You are going to sew the bottom on. Make sure that the fabric is inside out to make it the cleanest. You will do the same process of sewing as you did when you attached the top to the sides.
If the measurements are right, this should fit perfectly and you will just have to pin it. If the measurements are incorrect, you may have to make some adjustments by cutting your fabric or you may need to get a new cut of fabric.
Make the necessary adjustments to help it fit onto the edges of your side pieces and then start your sewing process.
Step 9: Putting in the Foam
Now it is time to put in your foam. This can be a difficult process since the fabric is supposed to be tight on the foam, but with a little bit of work, it can be done. An option to make the process is to use silicone spray. This will act as a lubricant. Be careful when gluing your foam together when trying to squeeze it in. You do not want your glue to become loose. Therefore, if you glued your foam together it is worth it to buy the silicone spray to make it easier to get within the fabric.
Otherwise, just mess around with bending your foam until it gets into your fabric. Once it is zipped up, you have got yourself a crash pad. This pad can be used for bouldering or any other activity you may need a crash pad for.